I should be concentrating on what workshop instructor,
Lisa Grey, is saying about mixing dye, but all I can think about are the ticks. Yes, ticks, as in Deer Ticks, the kind that carry Lyme’s disease. I am in New Jersey at
Peters Valley Craft Center attending a workshop called, Disperse Dyes: Reinventing the Wheel. I’m here at Lisa’s invitation as her guest and also because
this is what I do. I make art using Disperse Dyes, a class of dyes specially formulated to work in tandem with synthetic fabrics to produce vivid, detailed and exciting results. Lisa and I are among a handful of professional artists using these dyes, which are employed primarily and extensively in industry. I’ve taken many classes from Lisa, been her workshop assistant, and over the years we have become good friends, but still, I’m not paying attention to her. I keep thinking of the ticks. How many do you suppose there are between here and the car?
This being the first morning of the five day workshop we started with an orientation lecture from Fran, temporary assistant and knower of all things Peters Valley. She brought up the ticks, or maybe I asked about them, and said we should take precautions, like tucking your pant legs into your socks, wearing light colored clothing and bug spray containing DEET, as well as checking yourself every night for the tiny, pinhead size beasts. Don’t worry, she said, the local medical center is well aware of the situation and ready to treat anyone who develops symptoms (a bullseye rash, fever, nausea). I take a deep breath in an attempt to remain calm, but unfortunately the discussion doesn’t end there. It seems everyone has their favorite Lyme’s Disease story: someone’s roommate had it three times in one summer, a friend got it five years ago and still hasn’t recovered. It goes on, each person sharing until we get to, “my friend used to teach classes here, she and her husband came every summer. One year he contracted Lyme’s Disease, they tried to treat it but he died. She’s coming here to have lunch with me today, so please don’t mention it, you know, while she’s here.”
Making Art Makes a Difference
At that moment Lisa calls the class to order and begins instructing us how to mix the dyes. She demonstrates the proper technique of using the enclosed and ventilated dye booth, the scale, dye to water ratio…she knows there are beginners in the class so she is careful, explaining each step as she goes. After she finishes mixing the first color she says, “Okay, now everyone will get a chance to mix a color, Jennifer, would you like to do the next one?” I look up, startled by the sound of my name, and Lisa smiles at me. “Of course,” I say, “I’d be happy to.” All thoughts of ticks, illness and death fly away from my brain as I move toward the dye box. A sense of peace invades. I can do this. Five luxurious days of making art lie ahead. I’m ready. I’ll worry about finding someone to carry me to the car later.
Day One
 |
| Mixing the dyes for class • Peters Valley©2012 Jennifer Libby Fay |
We mixed a bright yellow and a buttercup, orange, red, flame scarlet, turquoise, blue, cool black and navy. Of course, one could make an orange from mixing red and yellow, turquoise from blue and yellow, but these colors are sold already mixed in the dye powder form.
 |
| Dyes, thickener, color tests: ready to start • Peters Valley • ©2012 Jennifer Libby Fay |
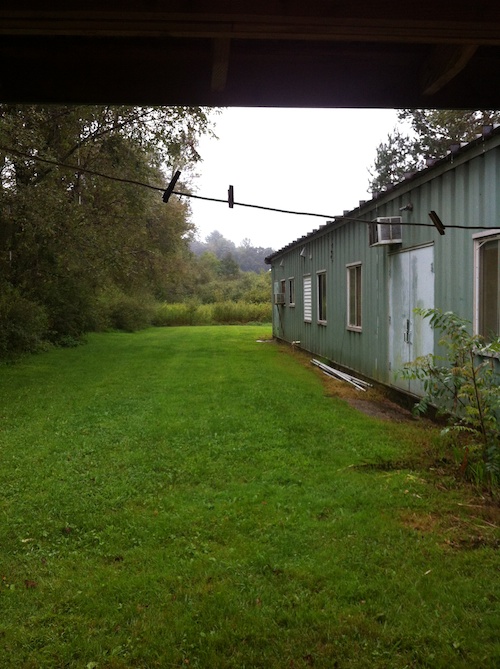
Each batch of the same color dye can vary due to things like temperature, water composition, and mixing conditions so dye stock colors should be tested first thing—it makes mixing easier if you know where you are starting. Here, the work table is set with dyes, thickener, water and tools. You can see the grass parking lot I was worried about in the background.
 |
| Working in collaboration • Peters Valley Craft Center • ©2012 Jennifer Libby Fay |
Our first day Lisa covered each work table with a different surface: cloth, newspaper, heavy yellow paper, and a length of white kraft paper. We each mixed a color, any color, no testing, everybody just guessed, and selected a brush or mark making tool. We circled the tables one at a time making marks as we went. These papers and cloth may become elements used in future compositions.
 |
| My work table • Peters Valley • ©2012 Jennifer Libby Fay |
After our collaborative exercises, we worked on our own, mixing colors we will work with the next couple of days and experimenting with the different markmaking tools available. I especially love the circular marks made by an antique whisk one of the participants brought. I need to find one for myself!
At the end of the day I can hardly remember my anxiety from this morning. I am awed by this beautiful sunset as I trudge across the grass to the car—tired, fulfilled and unworried about ticks, or anything else, for that matter. Once again, art has rescued me and nature has redeemed herself.



 Chinese
 French
 German
 Italian
 Japanese
 Korean
 Russian
 Spanish